Make it
Watch our 'Video guide to making your Acoustic Corrulute' (below) before you start.
(The only difference between the Acoustic Corrulute and the Electric Corrulute is the fitting of the piezo pickup to the sound box - see step 1b below)
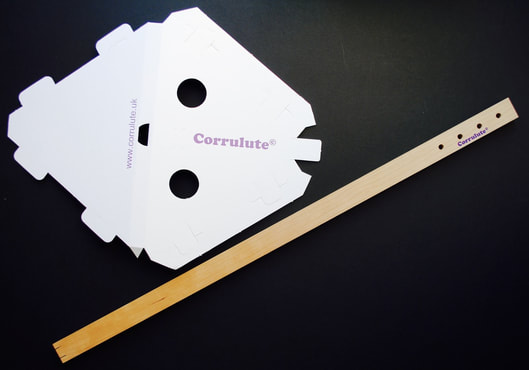
Step 1a. Folding up the sound box - Acoustic version.
(See step 1b for folding up the sound box on the Electric Corrulute)
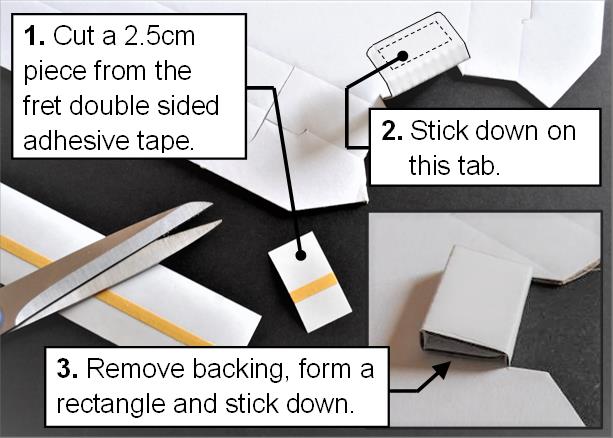
You will need: The soundbox, masking or sticky tape and a 2.5cm piece of the fret double sided tape.
Remove the neck from the partly folded sound box.
|
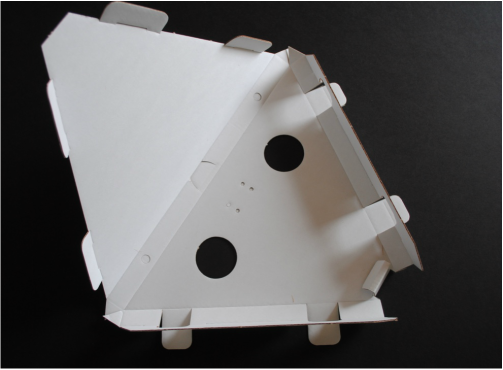
Finish off folding the rest of the creases as shown.
|
|
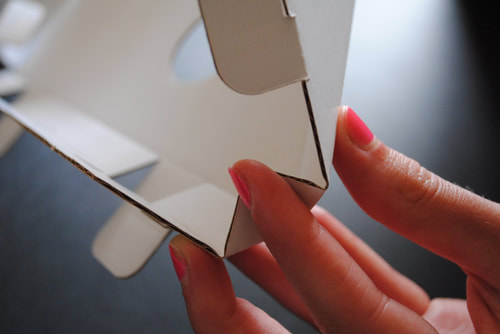
Fold in the small triangular tabs at the corners as shown above.
|
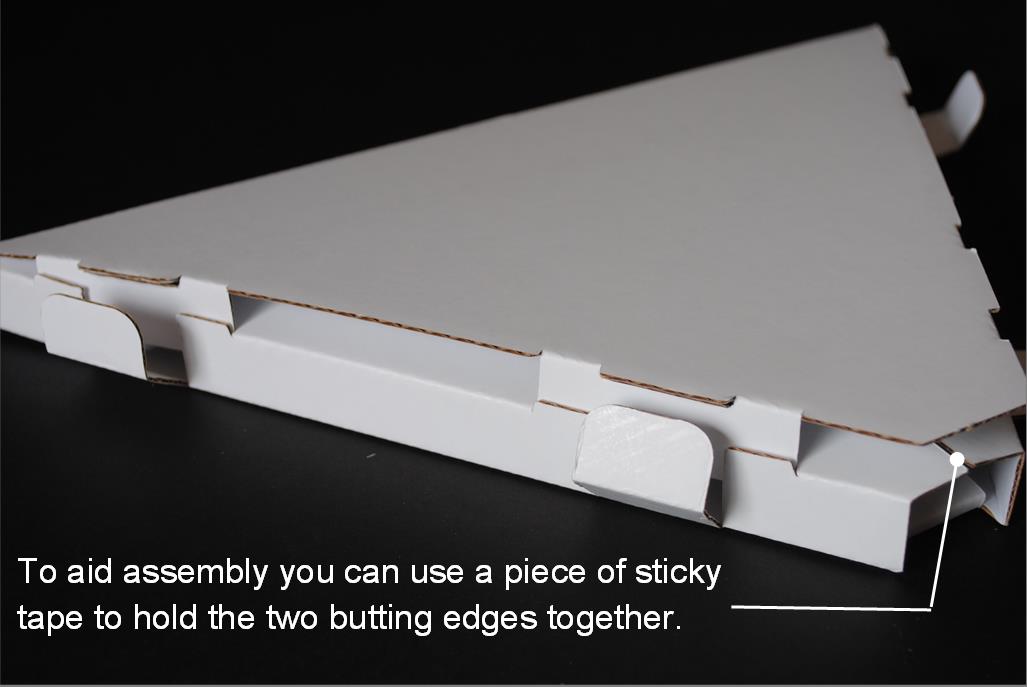
Fold up the entire body and secure with the locking tabs - there is no need to glue.
|

The finished sound box is now ready for decorating (Step 2).
|
Step 1b. Folding up the sound box for the Electric Corrulute.
You will need: The soundbox, piezo pick up, 12mm spanner or pliers, tape (masking or sticky tape) and a 2.5cm piece of the fret double sided tape.
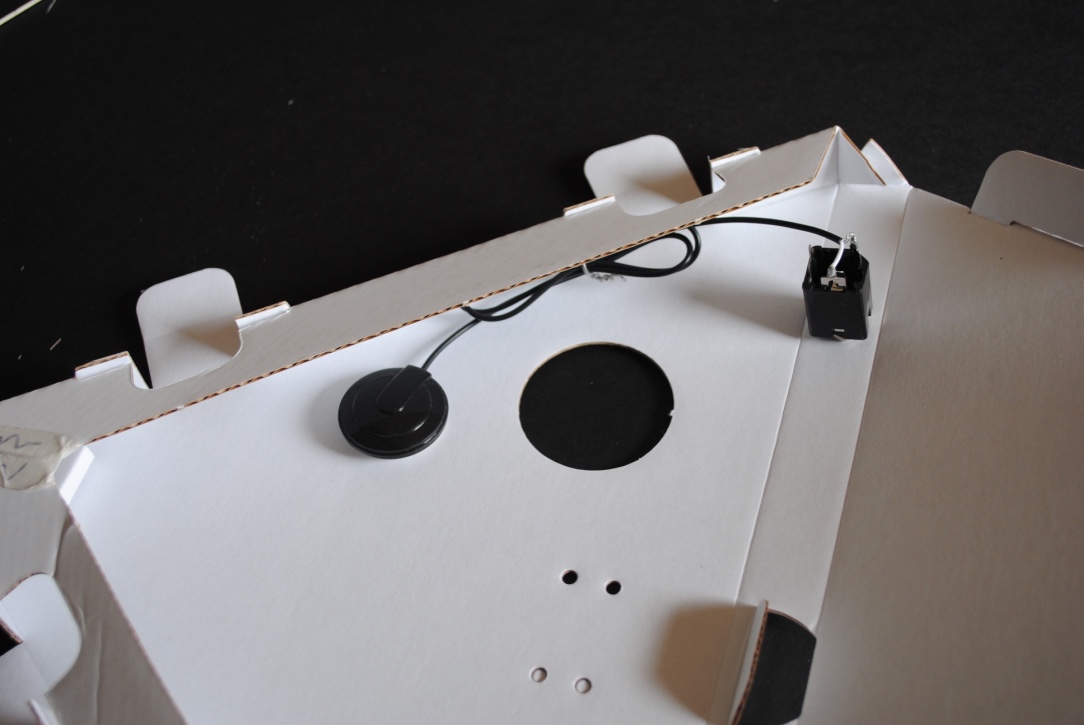
Fold up the sound box as in step 2a and insert the pick up as shown before closing up the sound box.
|
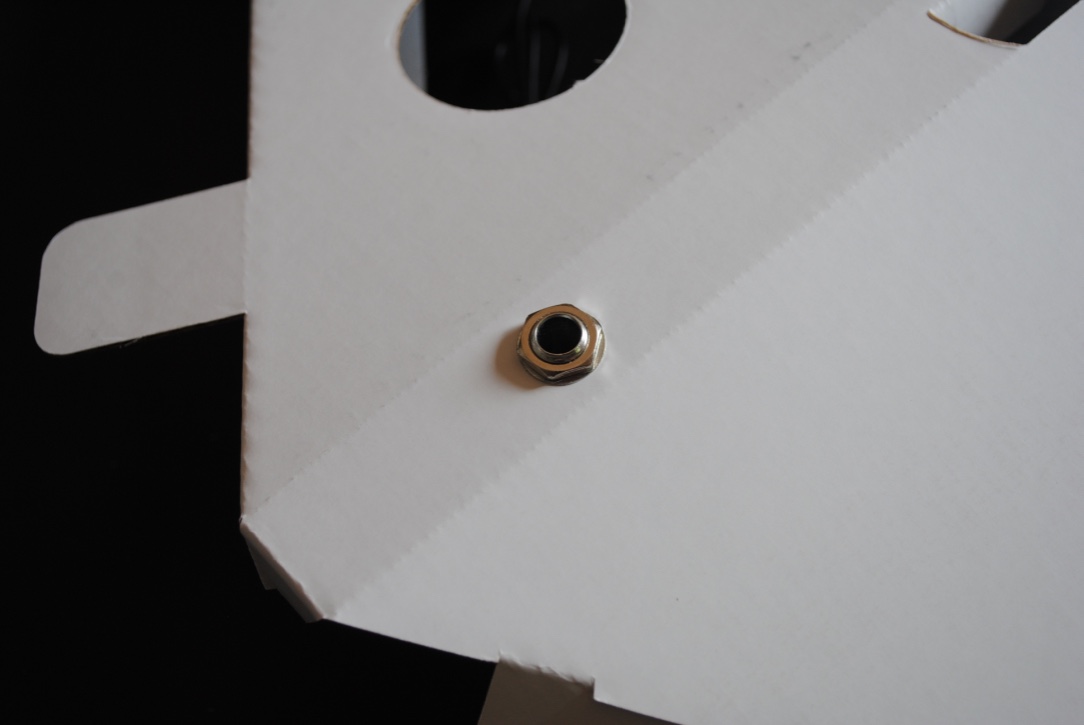
Fix the piezo pick up in place using the nut and washer. Use the second nut as a locking nut, tighten using a 12mm spanner or pliers.
|
Step 2. Decorate the sound box.
You will need: Sound box, and materials to decorate your sound box.
Tip: It is easier to decorate your sound box before assembly because you won't need to mask off the neck and bridge to protect them from paint.
- Decorate the outside of the sound box (printed with Corrulute and the website). You can use spray paint, acrylics, pens, felt tips, anything you feel like.
Tip: Have a look at our Gallery page for some inspiration.
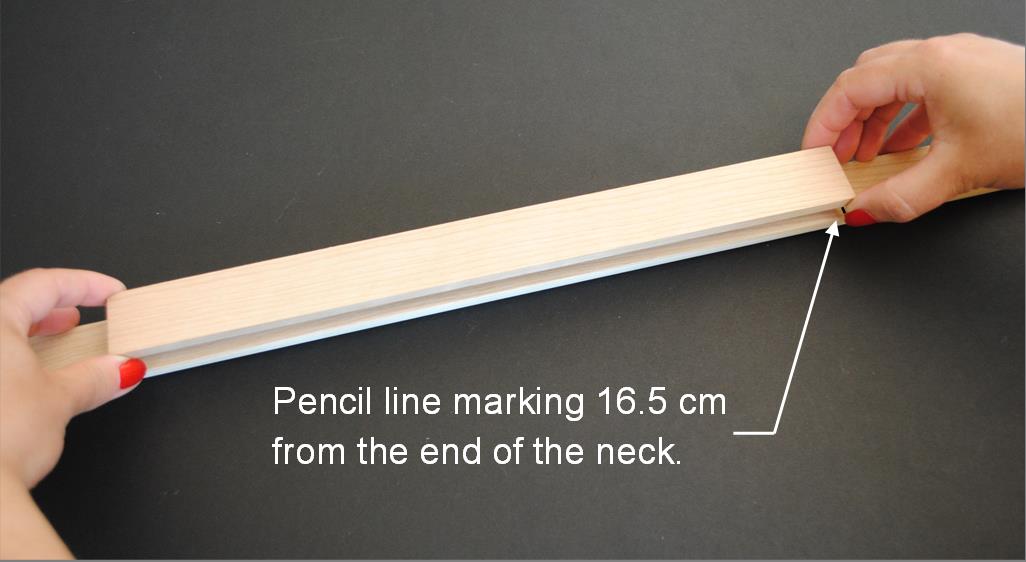
Step 3. Mark the position of the fret board on the neck.
You will need: The neck, fret board, pencil and ruler.
|
Next using a sharp pencil and a ruler, make a mark 16.5cm from the end of the neck.
Tip: Double check your measurements! |

|
Step 4. Stick the fret board to the neck.
You will need: The neck, fret board (and some heavy books like: Wikipedia—The Free Encyclopedia or The complete Miss Marple.
|
Remove the yellow protective backing off the double sided tape attached to the fret board.
Line up the end of the fret board with the mark you've made on the neck. Once you are happy that it's all lined up, apply pressure on a flat surface to securely stick the parts together. Note: Once pressure is applied to the joint, you will not be able to realign the parts. |
|
Tip: For the best results clamp for 12 hours or place under several heavy books so that the adhesive fully cures.
Step 5. sanding the neck.
You will need: The completed neck and the sandpaper supplied in the kit.
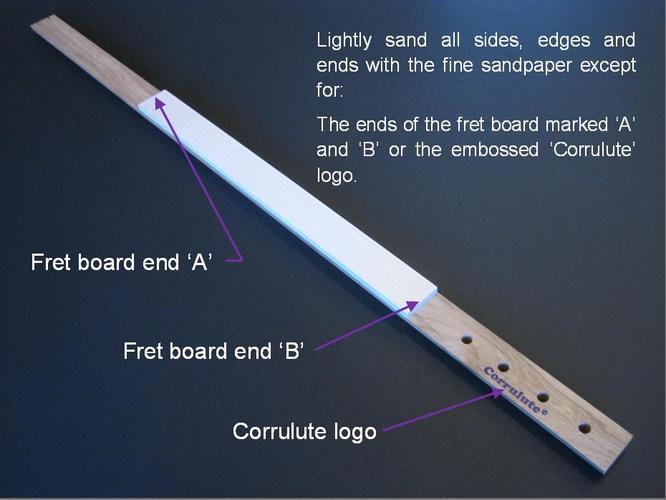
Tip: Remember not to remove too much of the neck when sanding - just a light sanding is required.
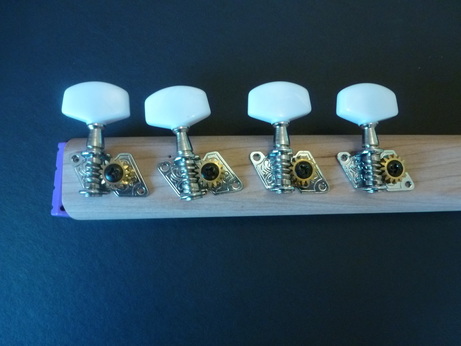
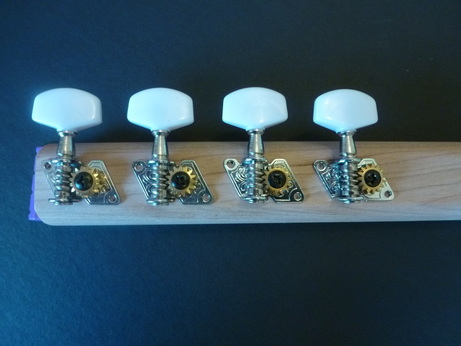
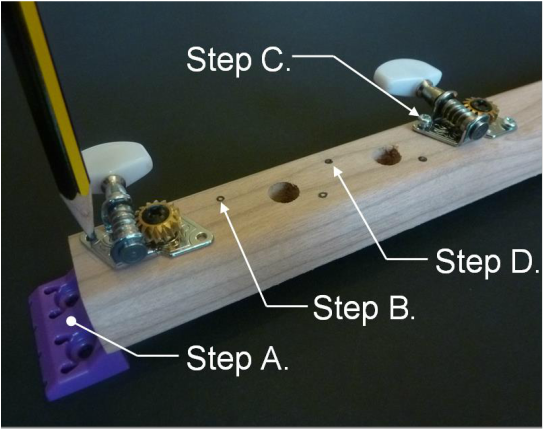
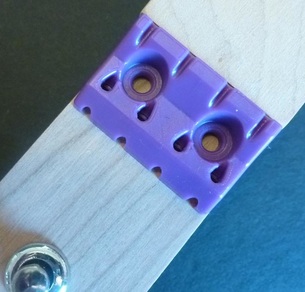
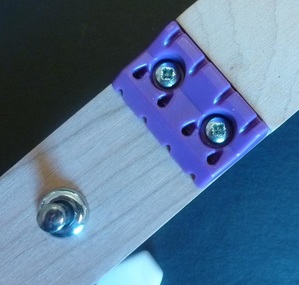
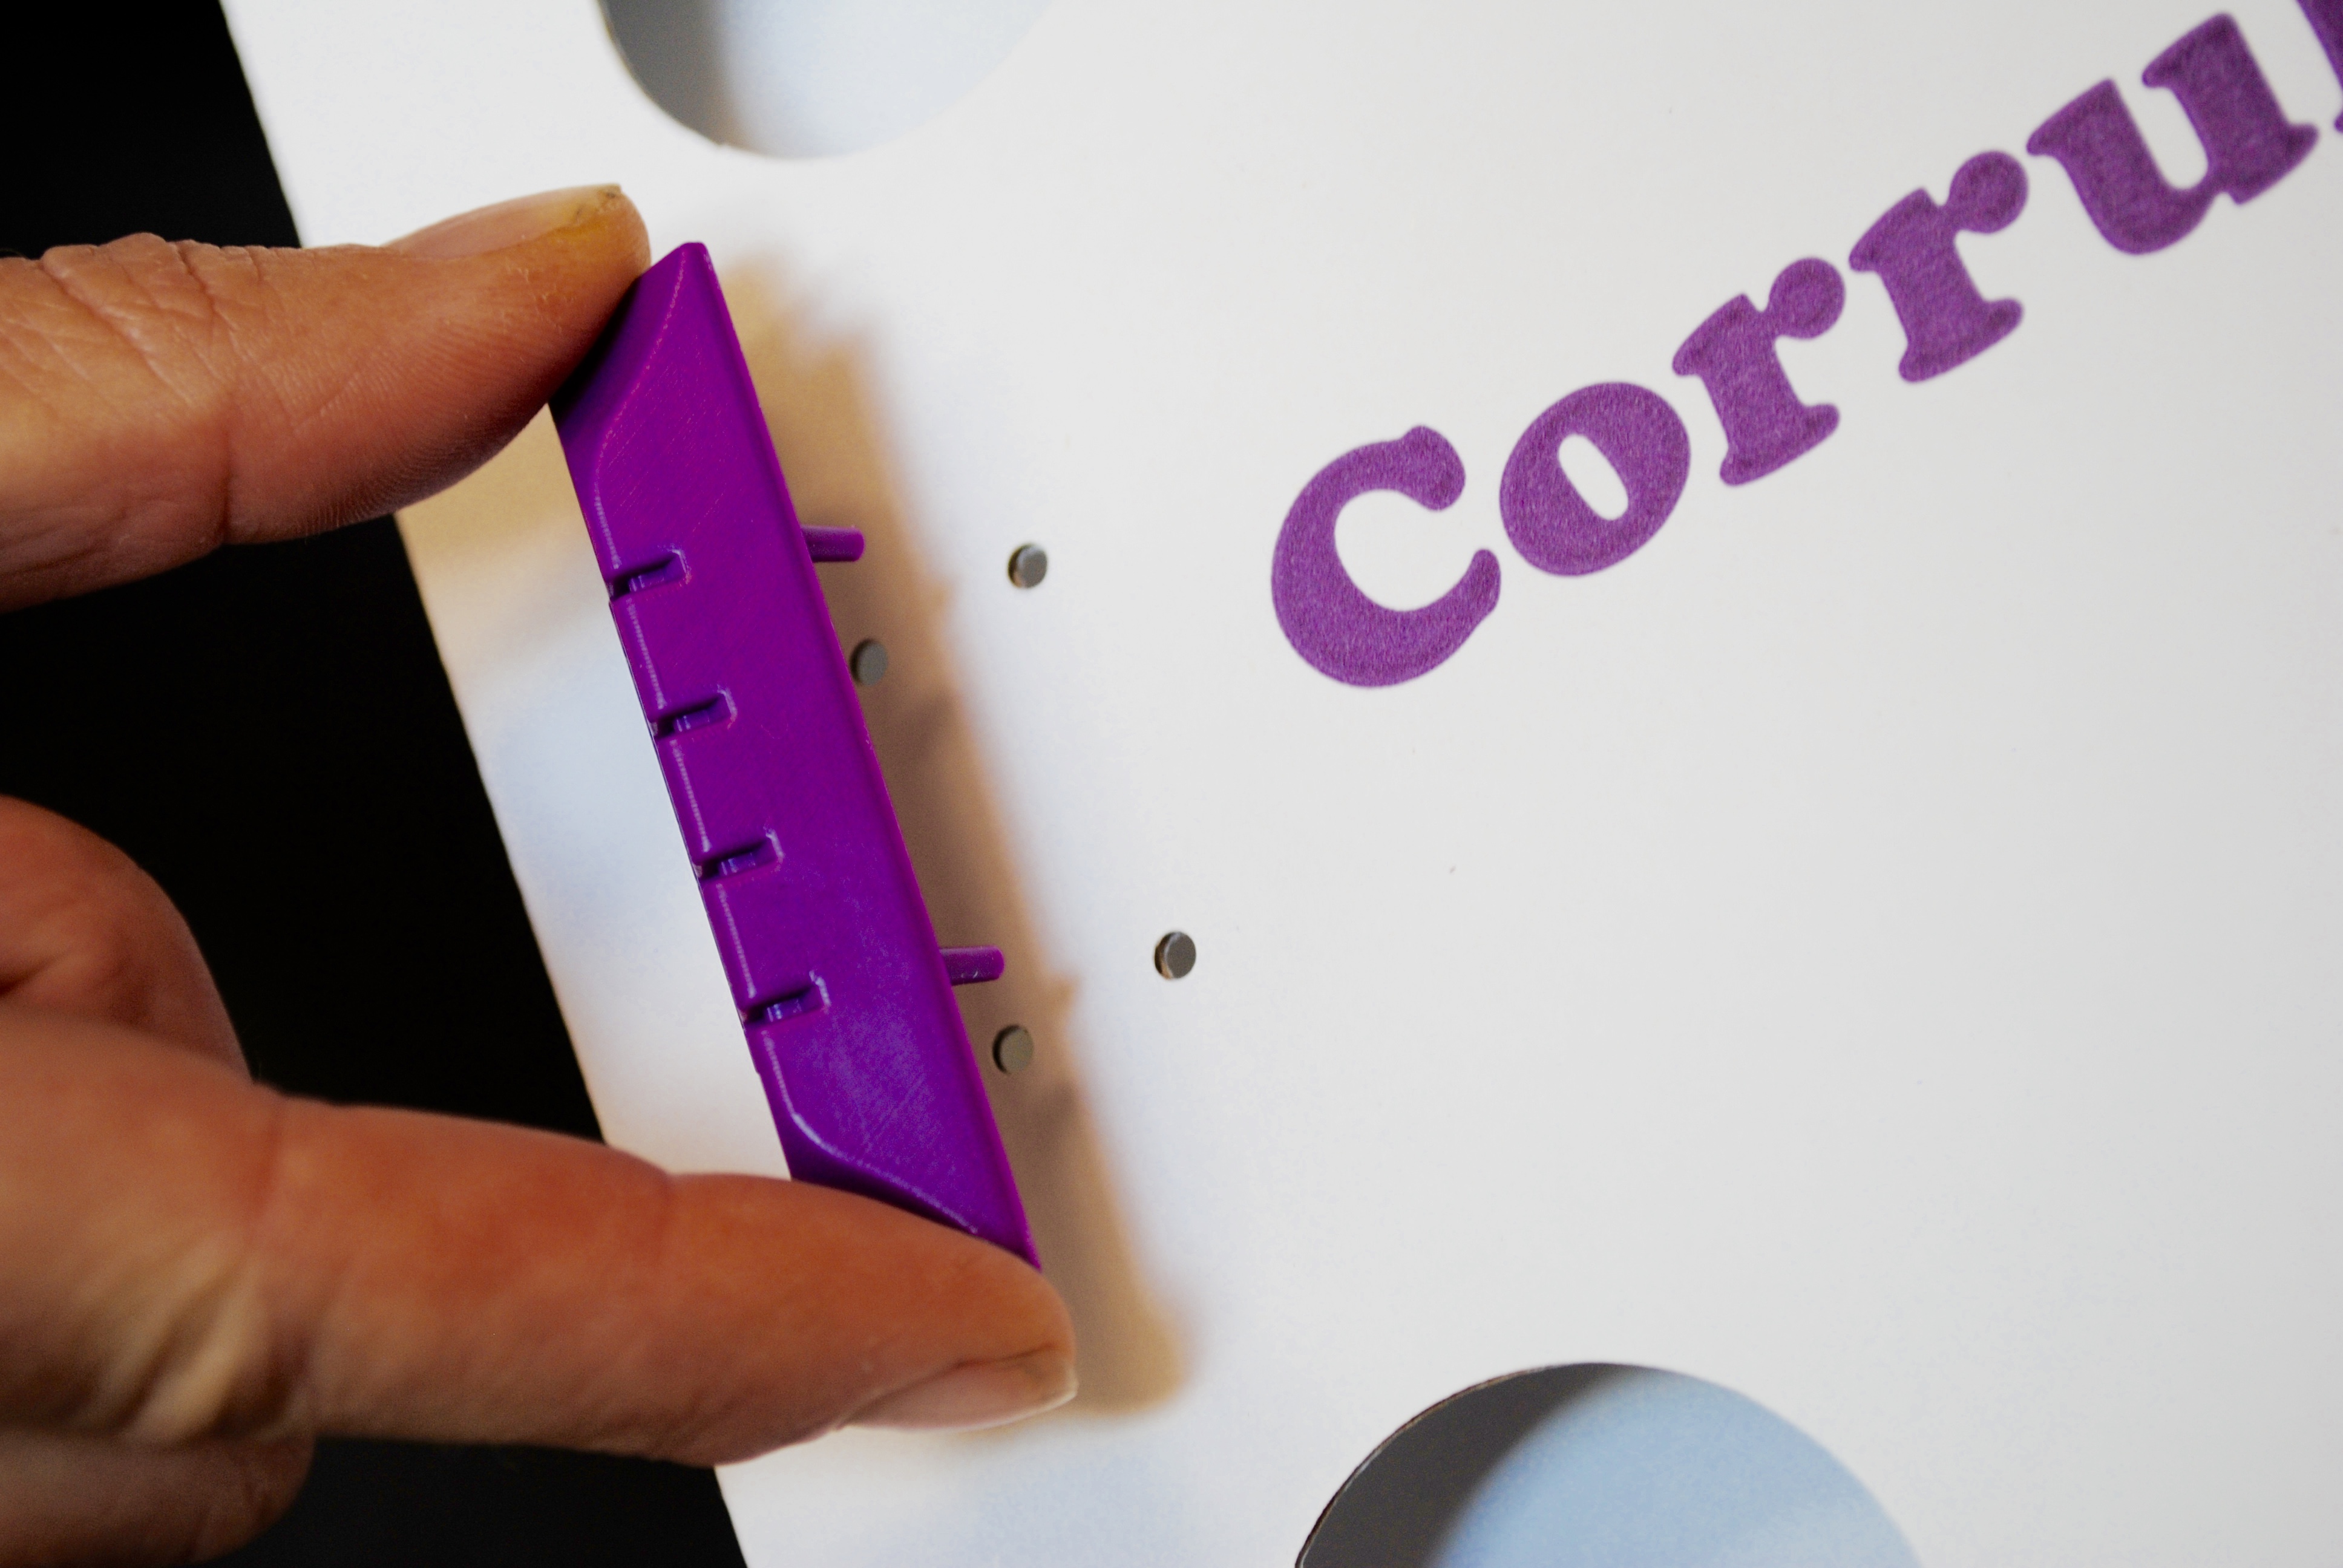
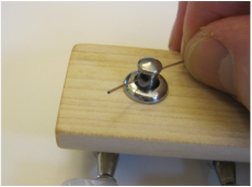
Step 6. Attaching the machine heads (tuners).
You will need: The neck, nut, 4 machine heads, 4 ferrules, 8 small screws, pencil and No1 Pozidriv screwdriver (you might require a small hammer and small nail or screw).
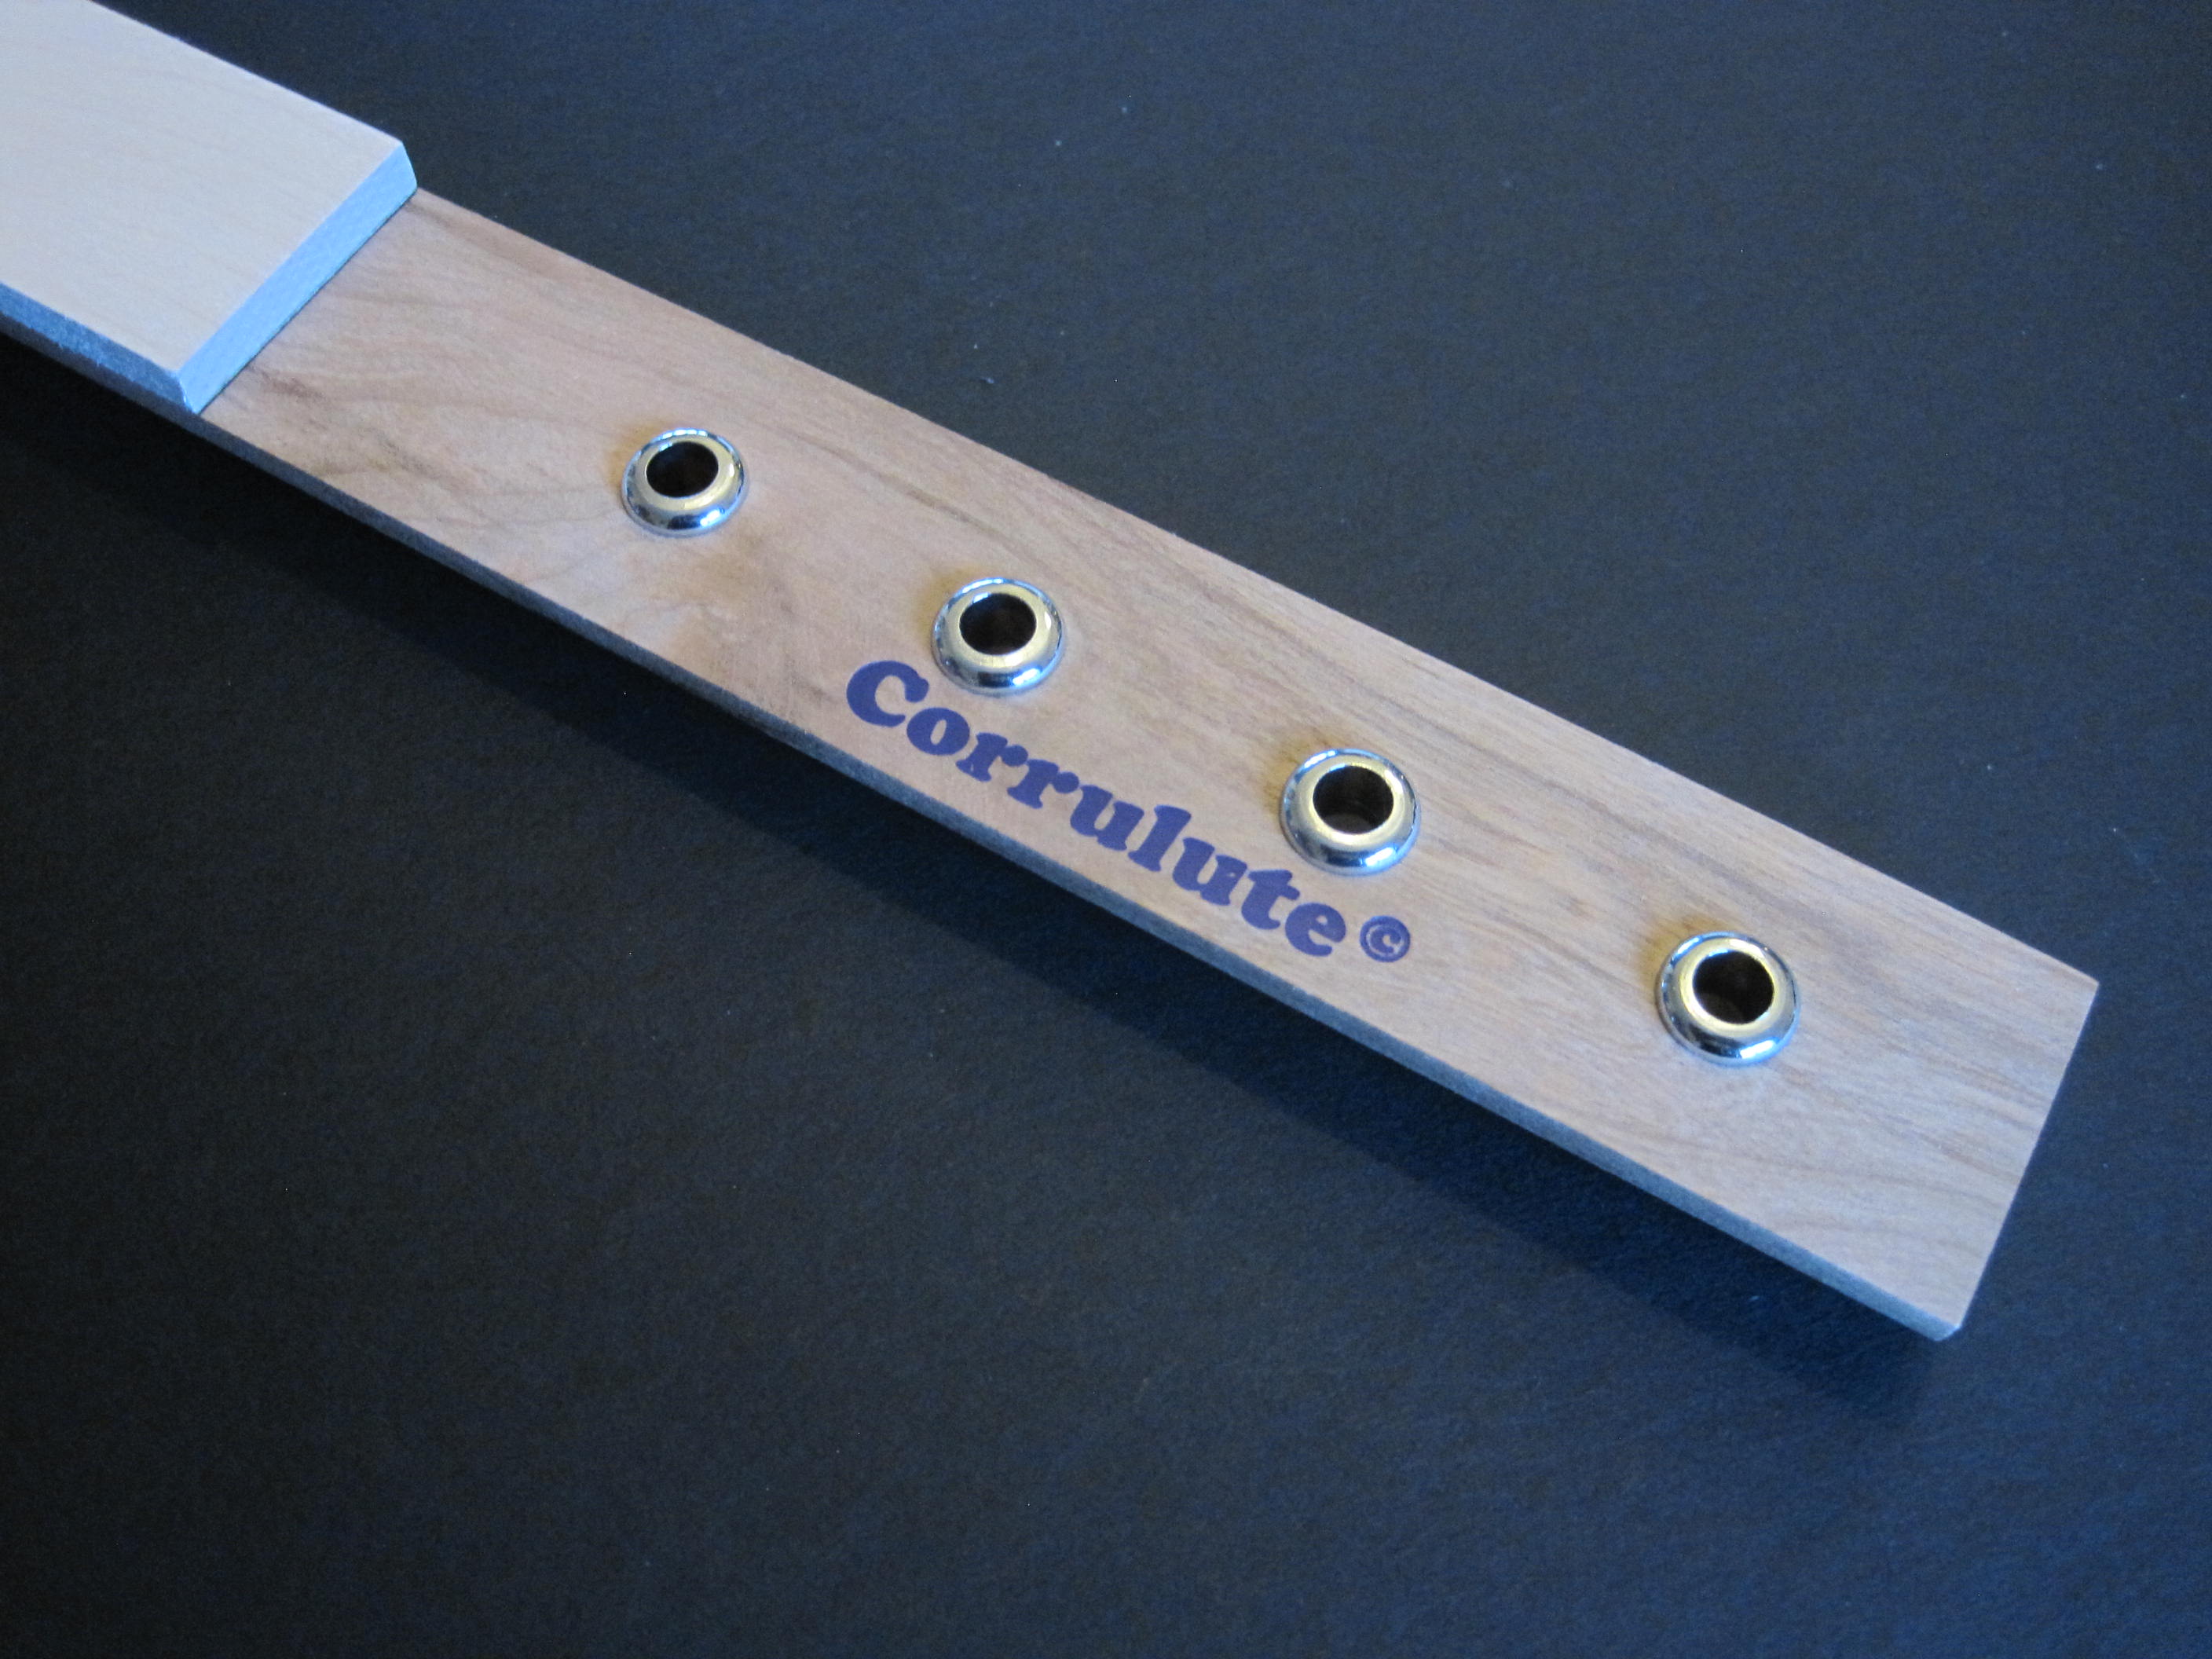
Insert the four ferrules into the flat (top) face of the neck.
|
|
|


Tip: If the ferrules are too tight to push down with your fingers, turn the neck over, lay it on your work top and push down on the neck using your body weight.
|
|
Tip: Be careful not to overtighten the screws..
If you strip the thread; remove the screw and refill the hole in the neck with a used match and start again.
If you strip the thread; remove the screw and refill the hole in the neck with a used match and start again.
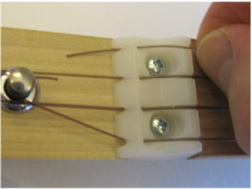
Step 7. Attach the nut with the fixing screws.
You will need: The neck, nut, 2 medium screws, hammer, nail/screw, pencil and No1 Pozidriv screwdriver.
A. Butt the nut up to the fret board and centre with your fingers.
C. Screw the nut onto the neck using the No1 Pozidriv screwdriver.
|

B. Mark the position of the nut fixing screws on the neck with a pencil.
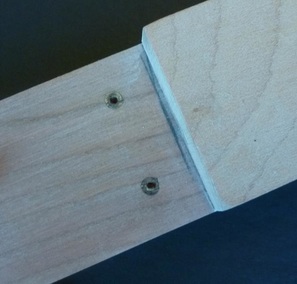
D. If you find the screws difficult to start, use a nail and hammer make a small indentation (2mm deep) in the neck as a guide for the screws.
|
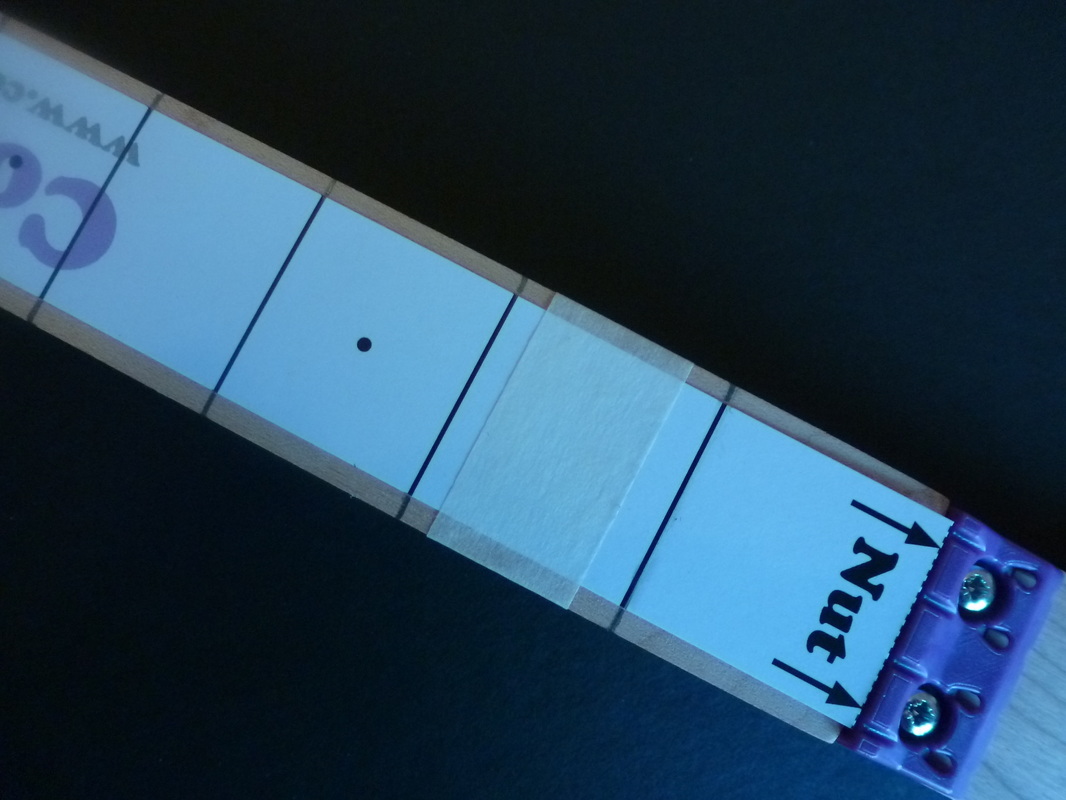
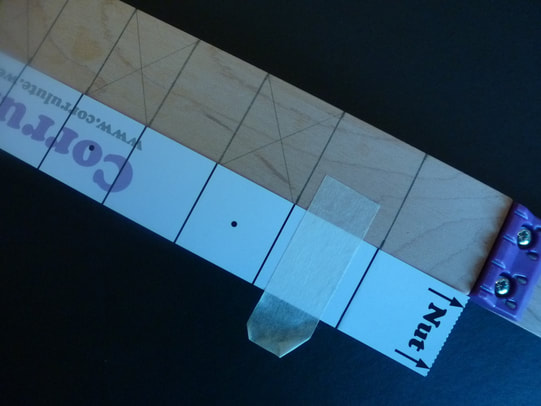
Step 8. Marking out the frets.
You will need: The neck, fret template, scissors, pencil, masking/sticky tape and a ruler.

|
|
|
Draw a line in pencil (using a ruler) over each of the black lines on the template from one side of the fret board to the other.
Tip: Do not cover the black lines on the template with masking/sticky tape. |
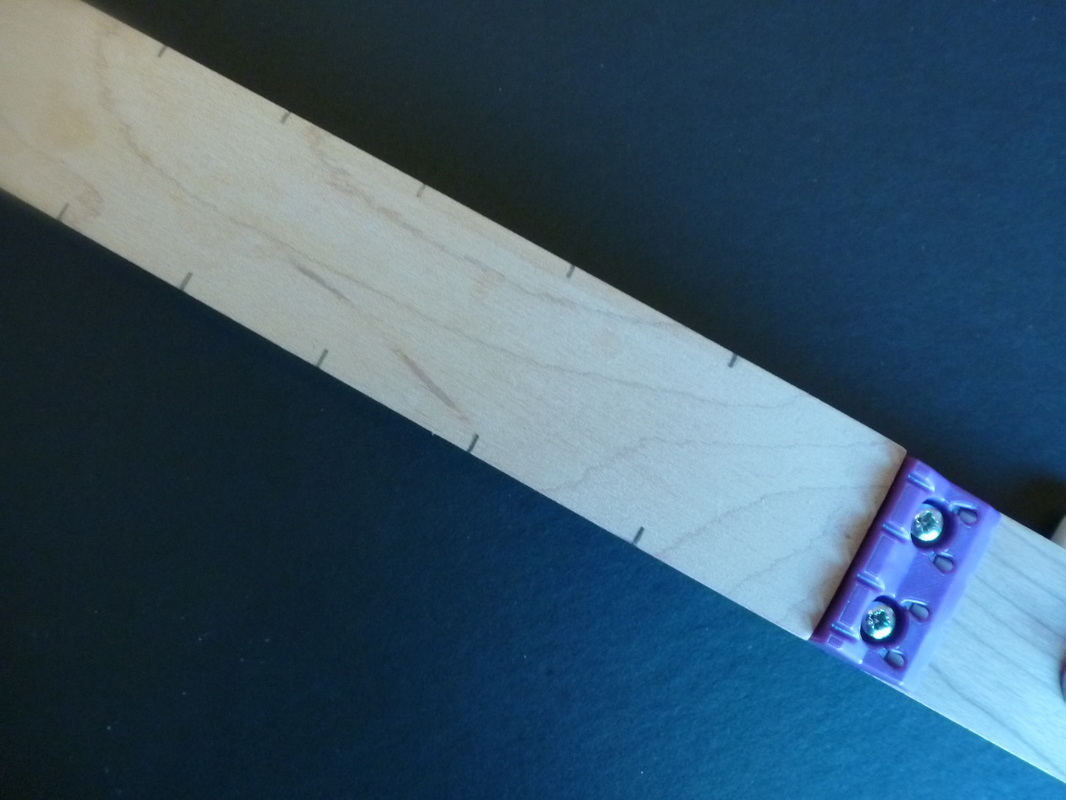
Carefully remove the template and check you have 24 marks on your fret board.
|
Using a pencil and ruler, join the marks on either side together to create 12 lines.
|
Step 9. (optional) Marking out the fret counters (dots).
You will need: The neck, fret template, pencil, ruler, eraser and dot sticker, etc).
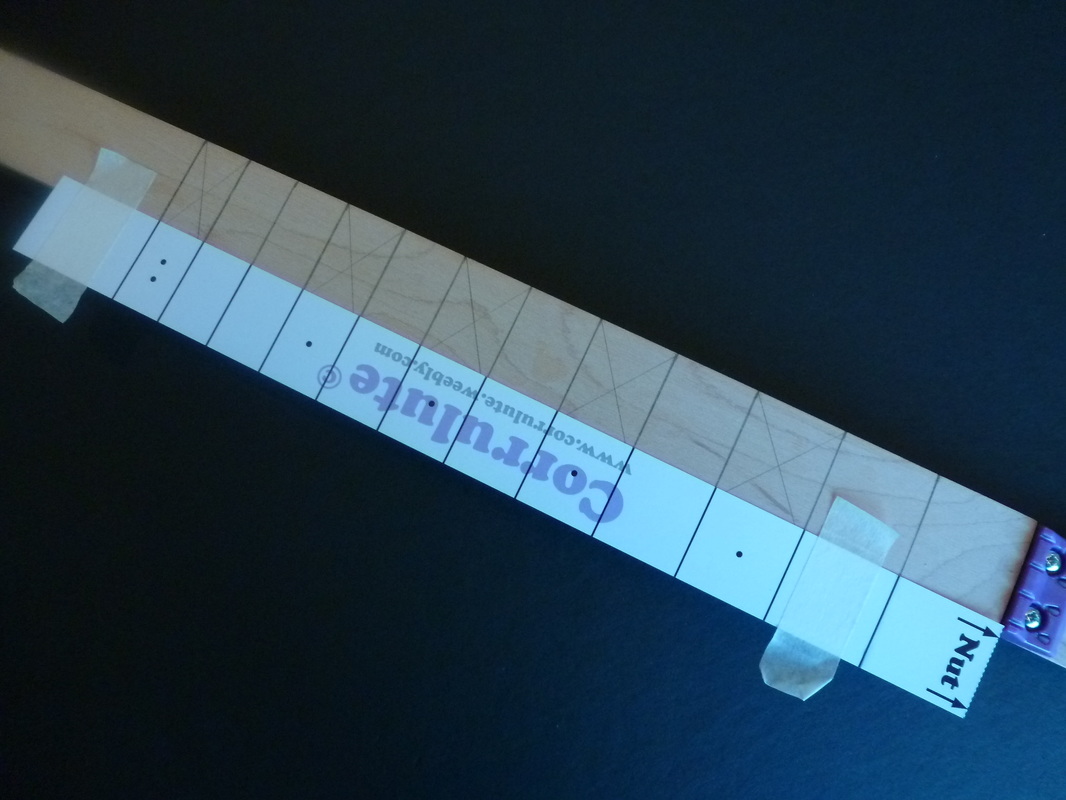
Lay the template along side the marks you've made to check they are correct and line up.
Tip: If they don't match up simply rub out and adjust as necessary. Check they match up with the position of the dots on the fret template. |
Join up the diagonals to make a cross on the 3rd, 5th, 7th, 9th and 12th frets using a pencil and a ruler.
Tip: (from a 9 year old) You can also use a sharp point (screw or nail) pushed through the dots whilst it's in place on the fret board to mark the position of the dots. |
- Mark out the dots on your fret board using paint, stickers or other method.
- When the dot is dry, remove the pencil marks with an eraser.
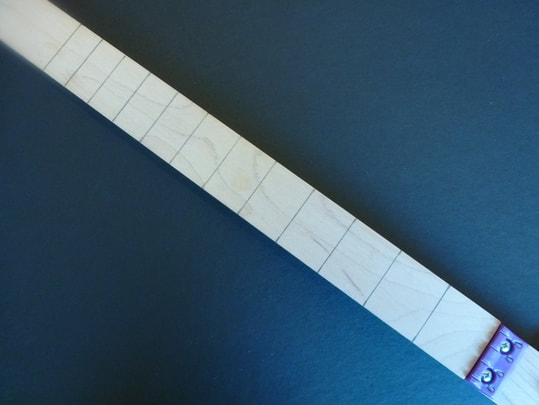
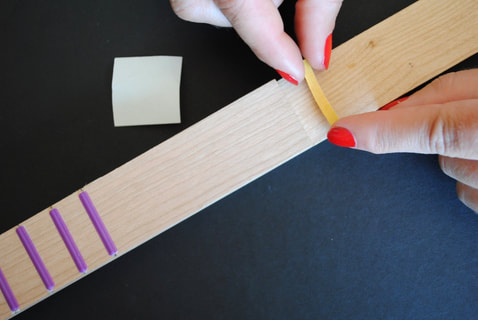
Step 10. Sticking the frets in place.
You will need: Twelve plastic frets, 50cm piece of the narrow fret adhesive double sided tape.
Tip: Wipe off any sanding dust with a clean cloth before you start.
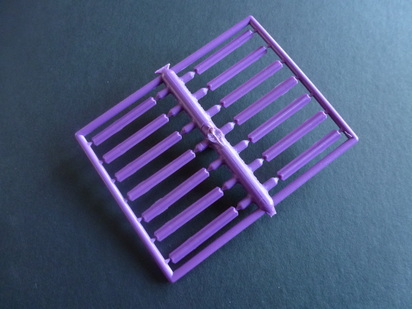
Remove 12 frets from the plastic frame (NB there are 2 spare frets).
|

Fold back the white backing paper from the fret adhesive tape, to leave the adhesive on the narrow yellow paper.
|
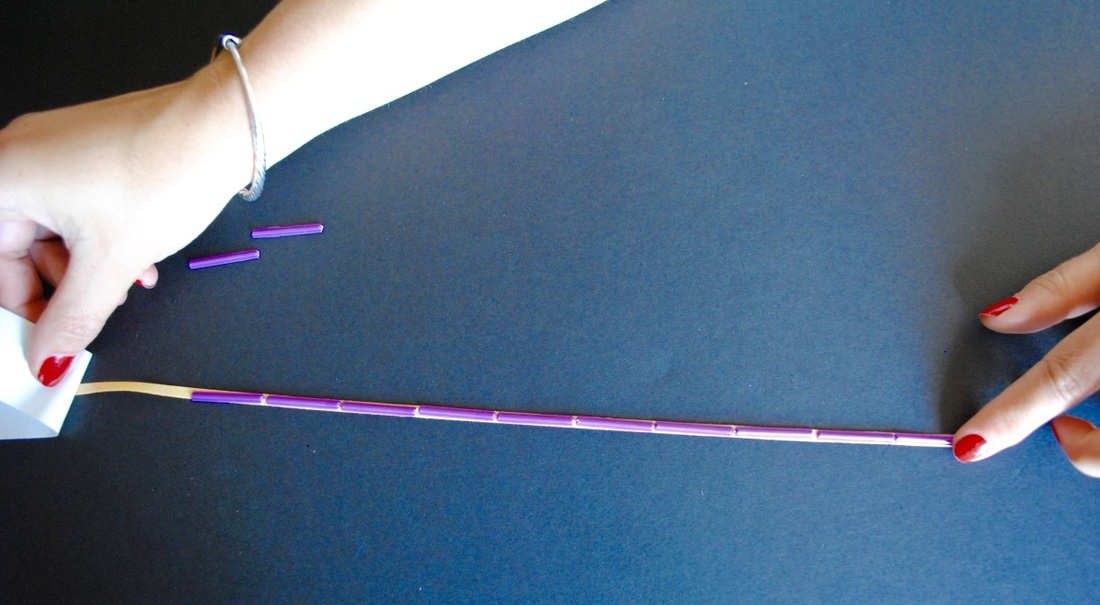
Carefully place the frets on to the double sided tape, to form a continuous ribbon. You can hold the tape to the table using a piece of sticky tape at each end.
|
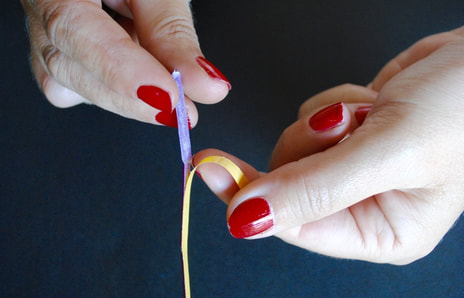
Peel back the yellow backing paper from the first fret.
|
Tip: Check the frets are parallel to each other.
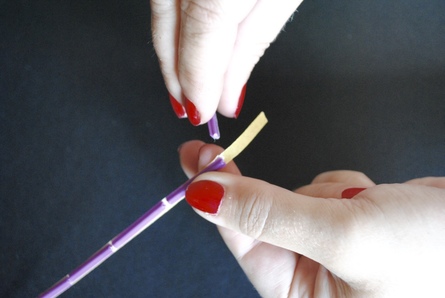
Tear the fret off making sure to leave the glue on the fret.
|
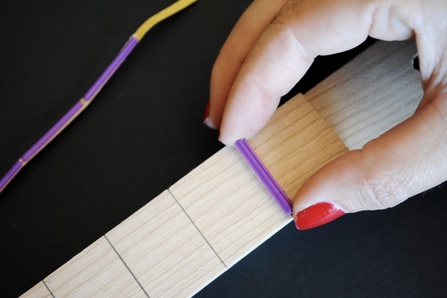
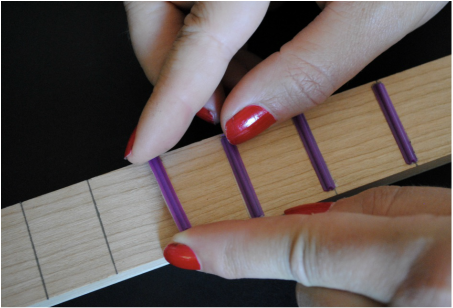
Carefully place the fret on the pencil line and push down when they are in the correct place.
|
Tip: The frets are very slightly shorter than the fretboard, try to leave an equal space each side.
|
|
|
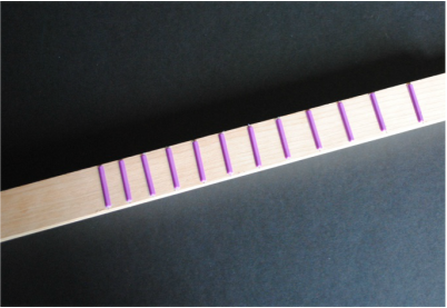
Work your way carefully along the fret board until all twelve frets are glued in place.
|
All 12 frets in place and parallel on the fret board.
|
Extension project:
If you want to add the two spare frets to make use of the long neck for lead work/shredding then have a go using this link: www.stewmac.com/FretCalculator.html (the number of frets is 14 and the scale length is 510mm).
If you want to add the two spare frets to make use of the long neck for lead work/shredding then have a go using this link: www.stewmac.com/FretCalculator.html (the number of frets is 14 and the scale length is 510mm).
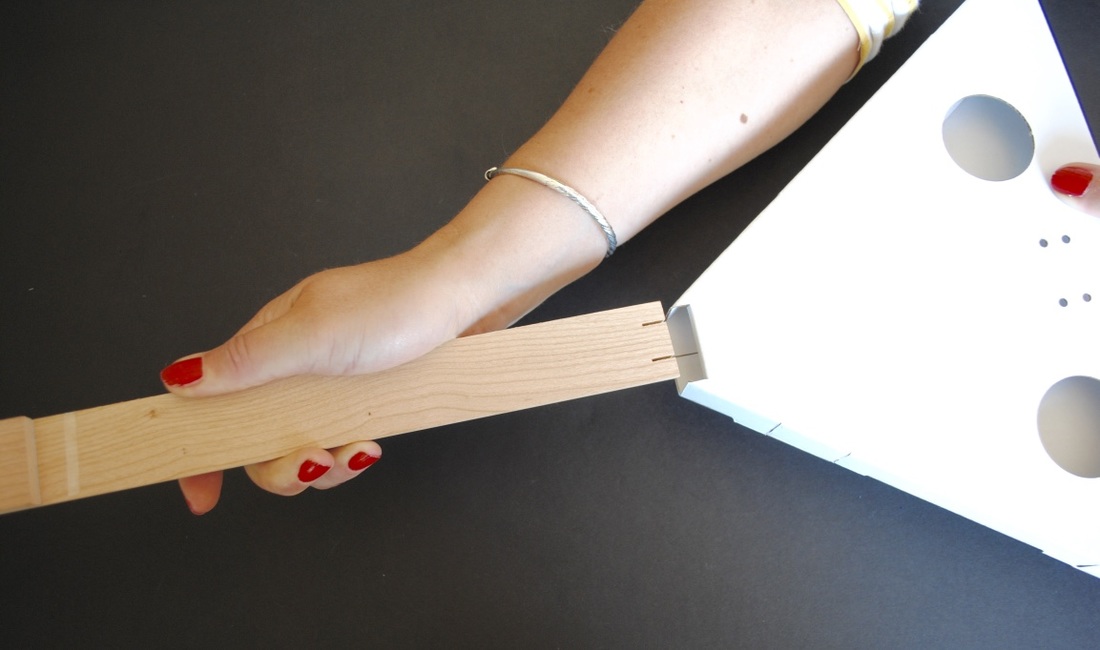
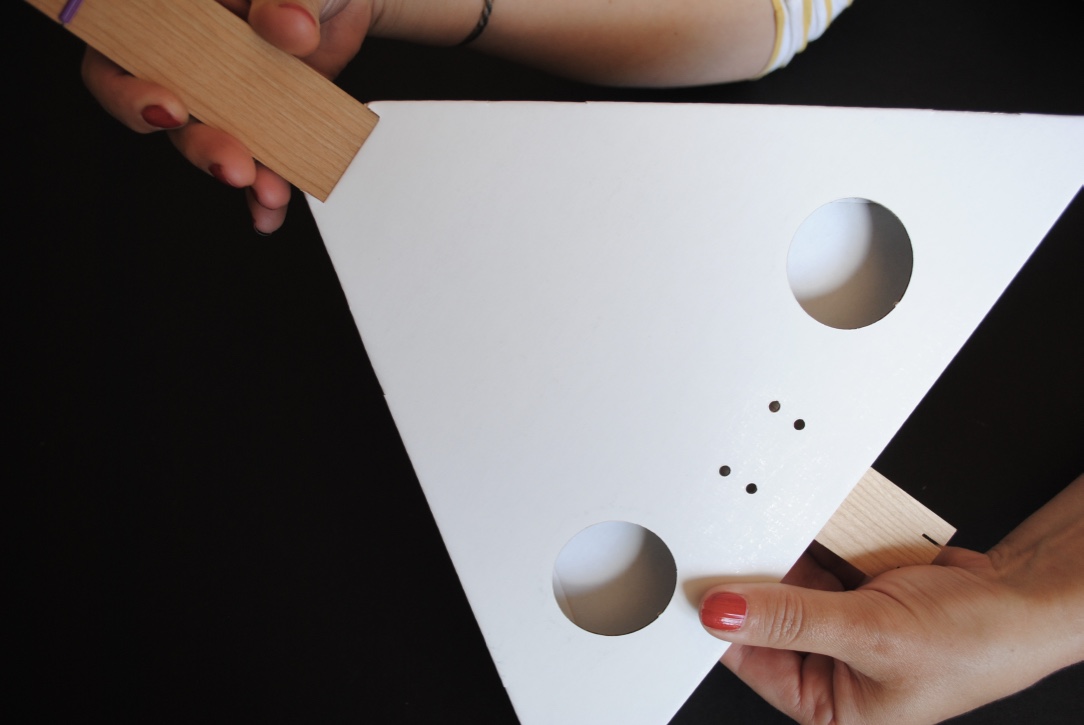
Step 11. Attach the sound box and bridge.
You will need: The neck, sound box, double sided tape and the bridge.
|
|
|
Place some double sided tape (or use a glue dot) on the neck as shown and remove the backing.
|
Slide the sound box onto the neck until it stops at the fret board and press down on top of the double sided tape to secure it.
|
|
|
|
Slide the sound box onto the neck until it stops at the fret board and press down on top of the double sided tape to secure it.
|
Remove the bridge from the rest of the plastic parts and trim off any excess plastic with a sharp knife.
|
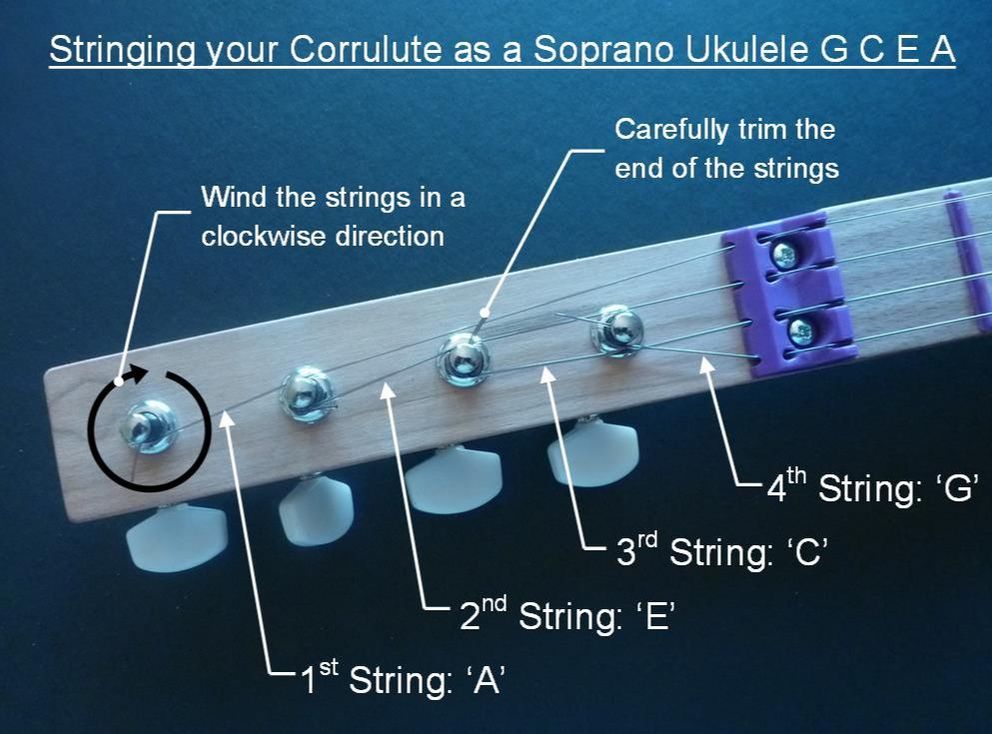
Step 12. Attaching the strings.
You will need: The Corrulute, four strings and a pair of scissors.
How to attach strings to the bridge end of the Corrulute:

Tie a double knot at one end of each string. Make sure the knot is large enough not to pull through the slot on the neck.
We're now adding stopper beads to kits in order to help prevent the knot pulling through. |
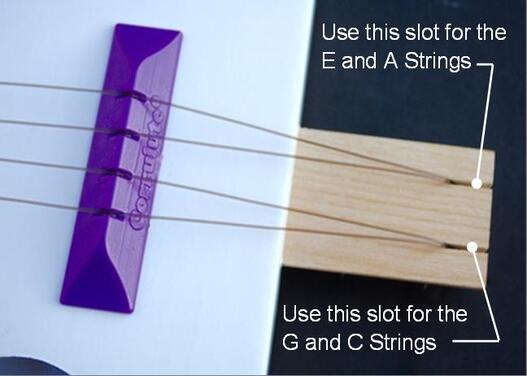
Place the strings through the slots as shown above.
|
Tip: Trim the end of the string with a pair of scissors once you're happy the knot won't pull through the slot.
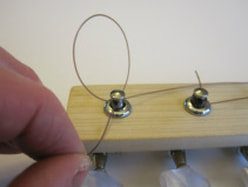
How to attach strings to a machine head:
|
1. Thread the string through the hole in the plastic nut.
|
2. Thread the string through the hole in the machine head.
|
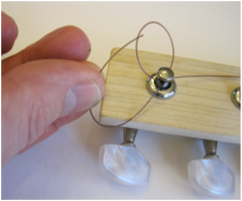
3. Loop it around 180° in a clockwise direction.
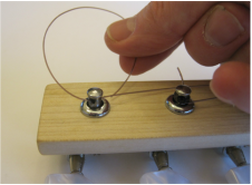
|
4. Thread the string back through the hole in the machine head.
|
Tip: Take the slack out of the strings before you start to tighten knot.
|
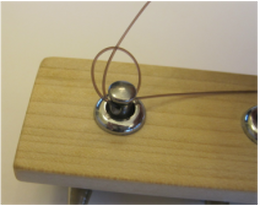
5. Thread the string through the loop you have made.
|
6. Pull the string to tighten the knot.
|
7. Trim the excess string at both ends with a pair of scissors.

|
8. Hold the string down when starting to tighten the strings.

|
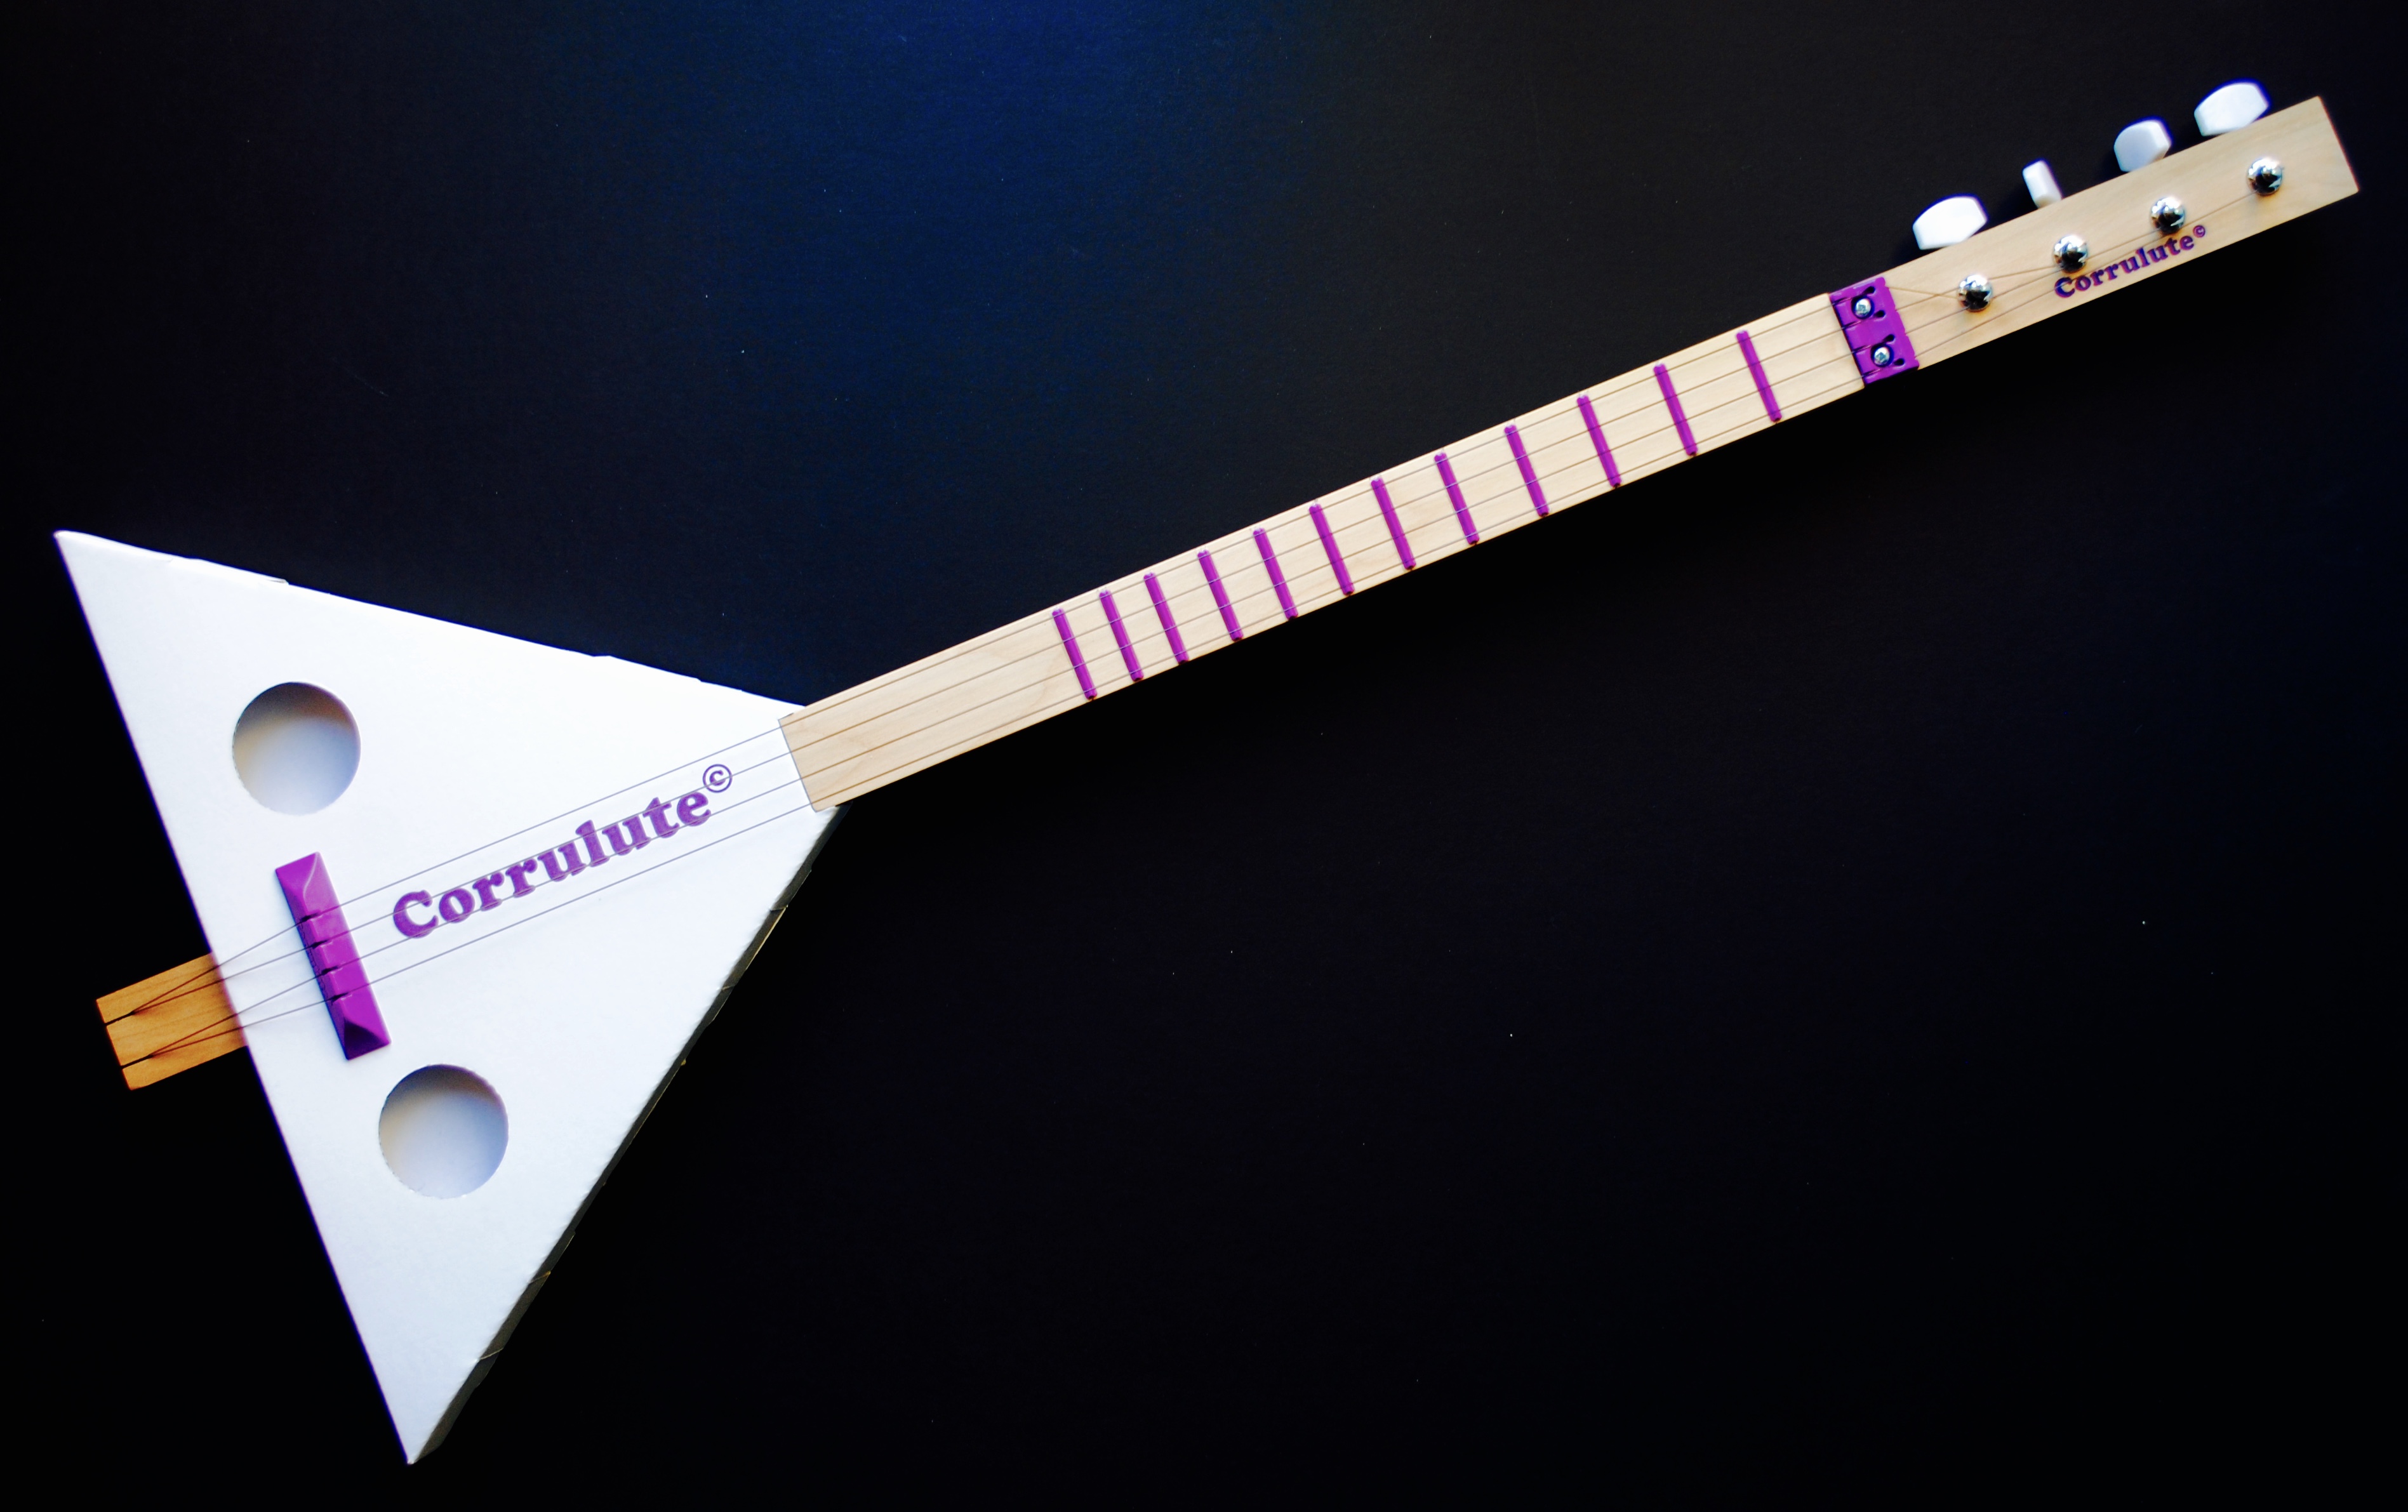
The finished Corrulute
Fine Tuning your Corrulute.
Problem: If when you strum the open strings of your Corrulute (without holding any of the strings down with your fingers) it's making a buzzing noise rather than producing clear notes then the nut is too low, causing the strings to catch on the first fret.
Solution: Raise the height of the nut.
To do this:
- Slacken off all the strings and unscrew the nut from the neck.
- Place a thin piece of card underneath the nut, replace the screws, tighten up just one string and give it a strum. If it produces a clear sound then you've solved the problem, if not add more thin card until the buzzing stops.
Product Information Disclaimer:
- This is not a toy.
- All children under 14 should be under the direct supervision of an adult when making a Corrulute.
- Not suitable for children under 8 years of age.
- Contains small parts that could be a choking hazard.